Highlighting is not an expensive and rather easy way to transform or refresh the faded color. The main charm of such staining - accessibility and diversity. For lovers of naturalness, light strands create the effect of burnt hair.

Highlighting hair can be done at home
Girls who prefer clear lines, curls stained more contrast. It is important that it is realistic to make highlighting at home and it is not necessary to spend money on the services of a professional master.
Follow the rules and succeed.
Like any procedure, highlighting has a number of rules, the observance of which allows to achieve a good result.
- Efficiency. You should not stretch the procedure for several hours, even if you get sincere pleasure from it. Too prolonged staining as a result will provide uneven and unevenly colored curls.

- Security. The paint is a chemical preparation, so you need to work with gloves, and put a towel or a special apron on your shoulders.
Council Applying a rich cream on the neck and on the contour of the face will protect against ugly stains from paint if it gets on the skin.
- Protection. After staining curls definitely need to heal. Highlighting the house, as in the salon, should end with the use of special care products that restore the structure of the hair.
- Relaxation. Coloring is undesirable to abuse. It is better to repeat the procedure no earlier than in a month and a half.

- Care. Properly do highlighting on dirty hair. Sebum protects hair from the harmful effects of aggressive dye ingredients.
- Here and now. Paint can not be stored. Ready to apply the composition is made only for a single procedure.
Types of staining or how to make highlighting itself
Make highlighting at home in different ways. Classics of the genre - coloring strands with foil or a special cap. Lightening strands also with the use of rubber bands, a rare comb with wide teeth, the Californian technique or the more complex and interesting shatush method.

There are many coloring options. The choice of technology depends on the length and density of the strands, as well as the preferences and skills of the wizard.
Highlighting through the cap, with the help of gum and a comb is suitable for hair up to the shoulders. Lightening with foil, shatush or Californian methods are excellent options for long curls.
Step-by-step instruction
- Cut the foil into narrow strips. They should be longer than hair. At one end, the foil must be bent 1.5-2 cm.
- Prepare the paint. Throw a towel over your shoulders.
- Divide the hair in equal parts into four parts: parietal, occipital and lateral. Stabbed with clips. We start working with the central part.
- We separate the strand, by darning we divide it into several thin parts.
- We put on them the painting composition.
- We enclose a foil.
- On the foil we process the end of the order.
- Twist the foil.
- So we handle the whole head.
- We maintain the time required to obtain the desired shade.
- Wash off the paint without removing the foil.
- Remove the foil. My head shampoo. We treat with special products for extra care.

Council If the hair is long and thick, then it is advisable to highlight only the upper part. If you are using high hairstyles, you can lighten several strands on the back of your head.
Highlighting through the cap
Owners of not very long hair, this method will seem the easiest. The action algorithm is so uncomplicated that even a novice can handle this job.

- We put a hat on the head and with the help of a special hook pull out individual strands.
- We apply the coloring composition and withstand the required time.
- Wash away the paint.
- Remove the cap and shampoo my head. Do not forget about the special care products after staining.
How to make a hat by yourself
If there is no desire or opportunity to buy a special hat, it can be made at home.
Highlighting cap is a polyethylene or rubber cap. At home it can be made from the usual package. It is enough to cut holes at regular intervals.

For drawing use a special tool, but some craftsmen use a regular crochet hook.
California highlighting
The principle of the Californian method is similar to staining with foil, but instead of a material which is not airborne, paper napkins are used. Masters claim that air plays an important role in the process of clarification.

- Carefully comb your hair and divide into strands one and a half centimeters wide.
- Apply the coloring composition. The paint should not fall on the adjacent strands, so you need to use paper napkins.
- After the necessary time to get the desired shade of hair you need to wash with shampoo.
Highlighting comb
It would seem that it is impossible to invent a method of dyeing individual strands easier than this. But behind the apparent simplicity hides subtle art, subject only to a professional or a person with accumulated skills.

The requisite for the procedure is extremely simple: a comb with rare teeth and paint.
The technology is also uncomplicated: the paint is applied with a comb to dry, well-pre-combed hair with one neat movement from the roots to the ends.
For this procedure, you can use a stripper - comb, the teeth of which are equipped with special holes. Through them, the paint gradually seeps into separate strands.
For home staining often use a regular comb with wide and rare teeth.
Shatush - a creative approach to lighting

This method is different in that the paint is applied to a pillow of combed hair. If desired, you can use foil. It is important to follow a few simple rules:
- Dirty hair.
- Bouffant.
- Do not drive the paint inside the pile, and put on top.
- When applying the coloring composition to retreat from the roots by 2 centimeters.
- Before washing the paint you need to foam, rinse your hair and only then apply shampoo. This will simplify the process of combing.
- Be sure to use hair care products after dyeing.
Highlighting the roots at home
When melirovanny hair grow, it does not look so critical, as at full coloring. But from time to time the roots of bleached strands need to be put in order.

When re-staining the roots are in the spotlight. The color of the strand over the entire length is only refreshed. To do this, five minutes before washing off the paint, you need to apply the coloring composition to the entire head of hair.
The procedure is the same as staining with foil. Root highlighting is very difficult to do on your own. This jewelry work requires special attention, because you need to clarify the same strands.

There are several options for highlighting hair and you are sure to choose the one that suits you.
Do not be afraid to experiment with your appearance. Especially with the help of highlighting. From this procedure, the hair suffers much less, and look really luxurious.
How to highlight hair at home: simple and effective techniques of dyeing
Highlighting hair appeared in the 20th century and quickly won the love of the fair sex. Many girls prefer to paint individual strands instead of a complete painting of the head. Despite the fact that this is quite a time-consuming procedure, you can do it yourself.
We will share with you the nuances of how to highlight hair at home.

Beautiful and voluminous hairstyle
Advantages of highlighting
This method has many advantages over ordinary painting. High-quality highlighting creates a visual volume hairstyle. Hair looks well-groomed and smooth.
Clarified strands perfectly mask the early gray hair. In this case, you can update the highlighting is not too often, it is enough once every three months. Thus, the final price of this procedure only pleases girls, allowing you to save a budget.

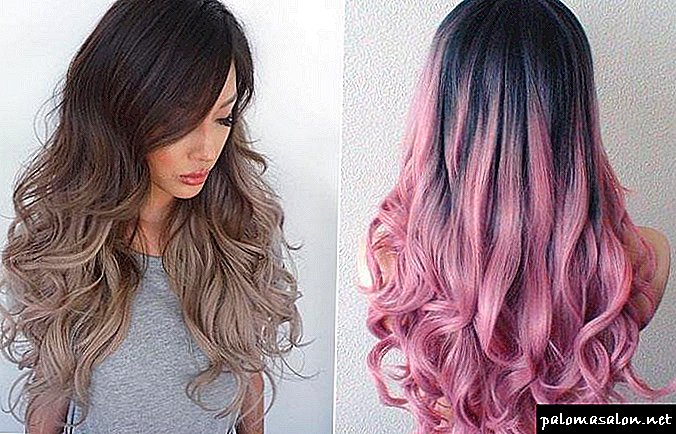
Intriguing contrast of light and dark pastel shades
Disadvantages of highlighting
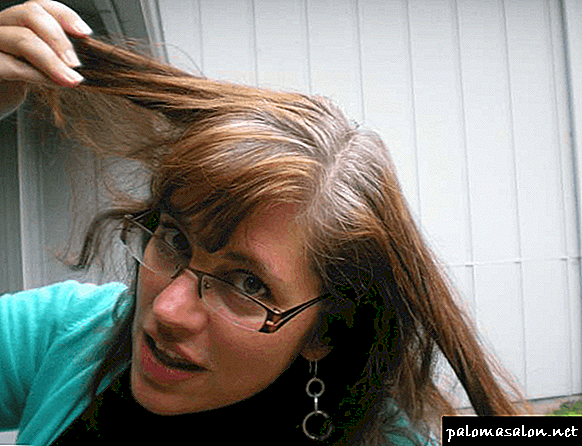
Unfortunately, dyeing itself is not the most beneficial procedure for hair. And when highlighting individual strands are lightened. If you have weakened brittle and damaged hair, it is better to undergo a course of revitalizing masks for the health of your hair.
It is also advisable to stop highlighting if your hair is freshly dyed and especially if henna was used for dyeing, as strands may become an ugly greenish tint when bleaching.
The very process of clarifying the curls is quite long, it can take up to four hours of your time.
Variations of highlighting
To proceed with the coloring, you first need to purchase and prepare everything you need. In this situation, you need a special set for highlighting, sold in stores. It contains foil or thermal paper, a cap and other necessary materials for the case.

Gorgeous masking of gray hair with highlighting
With the diversity and abundance of modern dyeing means, one does not have to worry about how to smooth out hair at home.
It is convenient to work with foil at home, so many women, especially beginners, choose this method.
Highlighting with foil
The undoubted advantage of using foil is that the final result will not be too noticeable contrast between the main hair color and melirovannyh curls.

The photo shows the process of applying paint.
For work you will need:
- Brightening powder. If your hair is thin and weak, try to buy a gentle brightener with a low percentage of oxidant. In that case, if you gloss the hair again, you can not apply the powder, and use the paint on one or several shades lighter than the main hair color. The most commonly used pearl, pearl, beige tones.
- Foil. You can take the most common foil for food or buy in a specialty store special foil, which is already cut into strips. The width of these strips is about 10 cm, and the length should be twice as long as your hair.
- It will take two combs. One you will separate strands, and the second should be with an elongated thin handle.
- Coloring brush, disposable gloves and terry towel to protect clothing.
- Capacity in which you will prepare the coloring structure. It should not be metallic.

Irresistible look of a gorgeous blonde
Manual highlighting using foil:
So, how to highlight hair at home? Comb the dry curls well, they should be unwashed for a couple of days. First, separate one strand of the desired thickness and place a sheet of foil under it.
Paint the strand evenly over the entire length and wrap the foil on all sides. For reliable fixing of the foil, you can use hairpins. After that, do the same with the next strand of hair.
Tip!
Always start applying the dye from the back of the head, as this “cold” area requires more time for the dye to interact with the hair.
The front of the head is painted last.

Highlighting dark hair with foil
Classic highlighting with a cap
This method is convenient for bleaching short and medium length hair. The result is a beautiful bright "feathers." It is not very comfortable to use a cap for long hair, as hair can be very messy with each other.
It is possible to do highlighting with the help of a cap with your own hands, without resorting to outside help. Special cap for highlighting is made of silicone. On its surface there are a lot of holes through which hair strands are removed by crocheting.
Note!
The thinner you will do hair strands for bleaching, the more natural and natural the final result will be.
After you have prepared the curls, apply a bleaching mixture and leave for 10-30 minutes. After the specified time, wash off the paint, remove the cap and wash your hair with shampoo.

Convenient to use silicone cap
Shatush technique
In addition to the usual straightening of strands, more modern and fashionable methods have recently appeared. For example, the technique of shatush. It is great for owners of long blond hair, blonde and brown-haired women.

Successful examples of shatush technology
The meaning of this color is to create the effect of color relief due to the smooth transition of light tones on the tips to darker tones at the roots. Due to this, an increased volume of hair is created visually, and the hair looks very natural, as if it were not dyed, but burned out in the sun.
Highlighting hair in the style of shatush requires a good skill, it is carried out using a special comb, using a special technique of combing.
How to make hair highlighting at home in shatush style:
- Divide the hair into many separate strands.
- Comb each strand. This is due to this creates a shading of color along the length of the hair. At the roots, the hair remains uncoloured, and closer to the ends more and more brightened.
- Foil with this technique is not used.
There is also a shatush technique without using a pile. It requires special skill in applying dye to the hair, so it will be difficult for a non-professional to perform it at home.

Fashionable coloring in the style of shatush
Conclusion
Highlighting never goes out of fashion. With the help of our recommendations and advice, it is possible to do these actions on your own, and get a stunning and effective result from a beauty salon. The video in this article will help to avoid possible mistakes in home coloring and will complement the information on this topic.
How to properly highlight hair (42 photos): a description of the main methods
Highlighting is a special method for dyeing hair that has been popular for many years. This method of changing the tone of the curls allows you to add additional volume, brightness and vitality to the hairstyle. In addition, it can be done not only in the cabin, but also at home - you only need to follow a certain sequence of actions.

In the photo: hair highlighting is a way to make the hair volume and bright
This article provides detailed instructions telling how to do this coloring strands with your own hands at home. In addition, we consider what means for highlighting hair is recommended to use and how to choose the right paint.
Features of the method and tips on choosing paint
This method has certain advantages over traditional monochrome coloring.
- One of the most common questions - how long the highlights are held on the hair. As practice shows, it is held for quite a long time, and therefore it should be carried out much less often - once every three months, since the difference between grown and colored strands does not appear so sharply.
- This method has no age limit. - it will suit both a young diva and a respectable lady.
- Not important and the length of the curls - it can be both short and incredibly long strands. In any case, the hair gain volume and shine.
- In this way, you can effectively deal with a little gray hair.

Highlighting has certain features
Note. Some wonder if hair blemishes spoil. Of course, any paint, no matter how high-quality it is, can have a negative impact on the structure of the curls. However, since this method involves staining individual strands, and not the entire head of hair, the negative impact is significantly reduced.
How to choose paint
Separately, let's talk about what you need for highlighting hair - of course, first of all you will need paint. There are certain rules that must be followed when choosing it.
So, on the shelves of beauty shops there is a huge selection of similar products, the price of which varies significantly. What is the choice to choose?
First, it should be noted that all funds can be divided into two categories:
- brightening powders
- oxidizing agents.

It is important to choose the right paint
Oxidizers should be chosen very carefully, because they are selected directly under the peculiarities of your hair, and therefore you must consider:
Therefore, when choosing an oxidizer should consult a professional. If you have never done this procedure yourself before, then the ideal option would be a special set for highlighting hair, which has everything you need.
We paint strands at home
The hair dyeing kit mentioned above has made the procedure incredibly affordable. The main thing is to know all the features of this or that method. In this section, we describe the most common technologies that allow you to change the color of the hair without the help of a wizard or help your relatives, friends or just friends of girls or women with this.
Note. Some are interested in how to prepare hair for highlighting. There are no special secrets. Preparation is identical to the one that is performed before the continuous coloring of the hair.
That is, simply do not need to wash your hair for three days before the procedure.
Using foil
To perform this procedure, you will need:
- composition for highlighting hair,
- pay special attention to the choice of an oxidizing agent: 12% are needed for dark curls, 6-8% for light ones, 3-4% for thin ones,
- fine brush for spreading the mixture,
- any foil
- comb with a long handle and a fine comb to separate the strands,
- gloves,
- plastic, glass or ceramic dishes for the preparation of the mixture,
- towel.

The picture is an example of how to put the foil under the strands.
The sequence of actions, which requires highlighting of hair on the foil, is described in detail in the table below.

The picture shows how to wrap the foil.
With a special cap
The procedure, which involves the use of a special cap, is incredibly in demand because of its simplicity. It is most effective if the length of the strands is 15-20 centimeters.

The photo shows how the cap is applied.
For this method you will need:
- bleach blend,
- protective gloves
- paint distribution brush
- comb with a long handle,
- utensils for mixing paint (not metallic)
- towel,
- special cap with small holes.
Note. If you do not have a special cap, then you can make it yourself. Take a shower cap or even a regular tight cellophane bag and cut small holes in a checkerboard pattern.
The process involves the following:
- cover your shoulders with a towel
- put a hat on your head,
- Using a comb, stretch small thin strands into the holes,
- if you want to make a light staining, then use only every third hole, and if it is intense, then all the holes,
- Prepare the mixture as instructed.
- spread on strands
- if you need light clarification, then you need to keep the paint for about 15 minutes, if it is intense, then about 45 minutes,
- after the allotted time has elapsed, wash the strands without removing the cap,
- blot them gently with a towel, and then remove the cap and wash the hair again using the shampoo and balm you are used to,
- wait for the curls to dry naturally.

The result of staining with the cap
Note. Some women are distressed - they say they ruined their hair with dye. This is only possible if you are not guided by our recommendations. For example, keep the clarifier longer than necessary or mix it in a metal dish.
California Method
In this case, the foil is not needed, since it is the free circulation of air that ensures the smoothness of the color transitions.
For this method you will need:
- mix for the procedure,
- brush for spreading the mixture on the strands,
- fine comb,
- gloves,
- dishes for mixing the mixture (not metal)
- cape or towel.

Californian highlighting
The process involves the following:
- cover the shoulders with a cape,
- comb the hair,
- select small strands, no more than one and a half centimeters wide,
- allocate strands strictly horizontally and in a checkerboard pattern,
- prepare the mixture as instructed
- using a brush, distribute it into separated strands,
- the brush should be kept strictly parallel to the curls,
- work very carefully, so as not to stain other strands,
- use ordinary paper napkins to shift already painted strands,
- hold the mixture for about forty minutes, and then wash your hair with a traditional shampoo and a nourishing balm.
Do shatush
The most gentle, safe form of highlighting is shatush, which allows you to achieve incredible changes in your appearance. Shatush is a true work of art, but it can also be made with your own hands.
Although, of course, it is necessary to recognize that, having no experience and knowledge, it is extremely difficult to make shatush. But if you are ready to take a chance, our instruction will help you.

In the photo: the hair before and after the shatusha
For this you will need:
- fine comb,
- cape or towel
- clamps
- ink mixture
- tinting agent
- paint distribution brush.
The process involves the following actions:
- separate some small strands,
- select them in any order - the more chaos the better
- fix each strand by means of clamps,
- take one strand and carefully mix it,
- Spread the bleaching mixture on the strands - make careless strokes, light and free, as if to spread gouache,
- when applying the mixture be sure to back away from the roots,
- do it with all the strands that you have separated,
- wait about forty minutes
- wash the strands
- take the tint tool and distribute it on the hair as described in the instructions,
- at the end of the procedure, wash your hair with traditional shampoo and nourishing balm,
- dry your head naturally.

Shatush - a method to make an exquisite hairstyle
What method of highlighting is better - a hat, or a foil? What is the difference?
Helga
Watching what hair. If short, then always do on the cap. Just on the foil there is something impossible to separate. With an average length can be done on the cap, and on the foil. The result will depend only on the master. Someone will pull out thick strands from the cap and end up with a coloring like a zebra, and even with sharp circles at the roots. Someone will take very thin strands and will end up with the effect of the hair that has been burned out in the sun. With foil, too, everything is not straightforward. There are several technologies. Masters in the salons often do the classic. That is, roughly speaking strips. Someone makes the stripes thinner, someone is thicker, but still stripes remain. But there are also other techniques for which stripes do not work, but a very interesting effect is obtained. Somewhere it will be strands looking through the upper dark and creating a star pattern at the tips (with a graduated haircut), somewhere it will be a “veil” effect, gentle spraying of light hair, creating a shine effect on the hair. I consider the last highlighting to be the most beautiful and I always do it. First, I persuade the clients for a long time, and then everyone says thanks :))) The whole trick of this highlighting is that the strands are parallel to the parting. If there is a bang, then it is parallel to it, that is, as with the classics. On the back of the head is done on the classics. You can turn the strands at an angle ...
The minus of the caps is that, firstly, it does not make it possible to use any other techniques. Stripes and that's it. Secondly, when the melioration grows on the cap, it is unrealistic to make a basal correction. That is, the same strands will not be caught and lightened at the roots. It is necessary to catch new strands. Among them will be and melirovannye, and natural. As a result, strands streaked 100 times will slowly die. With short hair, they are easy to cut, and with medium length. For it turns out a smooth transition from darker roots to the whitened tips. And secondly.. . it is very difficult to remove after staining. Even from medium length is hell. Pull all the hairs through tiny holes, and even after lightening ...
For long hair in general highlighting on the cap do not. Just then you can not take it off :) Yes, and the correction can really be repeated only when highlighting on foil ...
In short, my advice is: if the hair is not quite short, then only do it on foil. At the same time talk to the master at the expense of a technician. Few will fool around doing something not classic. I call these mater robots. They were taught one thing, they all their life and rivet. And no fancy. What for? Customers go, they like everything .... Only here the people here do not know what could be better!
current sssssss
You correctly noticed, who like ...
highlighting on foil and feathers - differ only in Russian. In English, this all has one name - highlights. That is, roughly speaking, both are feathers and the other, the only difference is in the technique of execution.
Through the cap it is better to do highlights only on short thin hair. The strands will be thin and will simply shade the already blond hair, but the overall color will be lighter in tone and volume will be created. Recommended for more blondes.
Highlighting with a cap or using foil?
Tell me please, what method of highlighting to choose?
a guest
I like the hat more. Hair just becomes lighter, and from foil weave "zebra". And even in the cap, hair evenly stained, and in foil while the whole head is smeared, the first ones are already “burning”, and the latter have not yet been dyed.
D-te
I did something like a hat, about ten years ago, the first time I did)) Choose a foil, and preferably from a good master, or even manage to spoil it))
D-te
I like the hat more. Hair just becomes lighter, and from foil weave "zebra". And even in the cap, hair evenly stained, and in foil while the whole head is smeared, the first ones are already “burning”, and the latter have not yet been dyed.
The reaction in the paint in half an hour will end, and nothing will burn.
Aunt
IMHO in the cap is the only plus - that the guaranteed coloring matter does not fall on the scalp.
And for me - definitely foil. There, “refinement” can be preset, and in general it is better to see which strands and where you need to take, and in the cap it is blind.
Marquise
The reaction in the paint in half an hour will end, and nothing will burn.
When highlighting, the reaction does not stop - there is no such property for blandoran.
Marquise
Cap for short hair, Folk - for long.
And about the fact that the hair is burned, not burned, then it depends only on the master, on which oxide it will dissolve the blonddor, and also on how it will be collected on the foil - the pattern on the hair depends on it.
Natusik
6, in the foil also misses the scalp.
and what is the problem here - a short hair hat, a foil for long ones - and it will not be a zebra 100 percent if you don’t do it in a hairdressing salon for 3 rubles
Natusik
you probably just did not see how in this foil strand recruit)
there are many techniques, all individually
rather than stupidly took a strand and painted, then just like a zebra
Caroline
even the masters themselves see how much quality the client's hair has if the thin ones are easily vulnerable, then the foil, and if it is thick and thick, then it will stand better through the cap when my girlfriend at least pulls out at least as much as
Goldilocks
According to my observations in good salons do only on the foil.
Aunt
9, when highlights, it does not fall, but then, when washing everything can be.
Tanya
I want to pardon and it seems to me that it is better to do it with foil! Just through the foil will often be painted strands, and if you use a hat, then less often much =)
 Large highlighting on dark hair
 Highlighting long hair with bangs photo
 How to make highlights on short hair
 Highlights on brown hair
 Fine highlights on light brown hair
 Highlighting and coloring on light brown hair photo
 Highlighting on dyed hair
 California highlights on dark hair of medium length
 Highlighting on copper color hair photo
 Cascade on long black hair
 Ombre for long brown hair photo
 Highlights on dark short hair
Is it possible to do yourself how difficult it is
Highlighting is not as difficult as it may seem.

There are various methods that are used at home, some are easily applied without helpers (use a comb or elastics for hair).
For some, you need a second mirror to see your own nape (cap use), and for some you need an assistant (foil use).
However, you should not be afraid, it is not for nothing that they say that the eyes are afraid, and the hands do Maybe the first time, not everything goes smoothly., but each time the procedure will be easier and easier, and the result will please more and more.
The main difficulties are that own nape hard to see even with the help of 2 mirrorsand when it is necessary to pull the straps through the holes in the cap, it will be difficult at first to get into the perforation from the rear until a certain skill appears. It's hard without the habit of keeping your hands on weight for a long time.

On our site you will learn all about the technique of highlighting for blond hair, and what tones are suitable for such coloring!
And how will highlight look on red hair? On the choice of colors and a few photos with the results look here.
In our next review, we will talk about how to make California highlights, and there you will find training videos.
What you need to work at home
First of all you need to decide on the method of highlighting and then buy everything you need:

- paint dilution tank
- bleaching composition (3–6% for light hair and 9–12% for dark hair), thick enough to not flow,
- brush for applying the composition,
- comb to separate the hair into strands,
- hand protection gloves
- a towel or a special cape to protect the shoulders.
In addition, depending on the mode of highlighting, you will need:
- special cap with holes,
- special foil for highlighting or usual for domestic use,
- non-metallic comb with sparse teeth
- rezinochki.
Through the cap
The essence of the technique consists in pulling thin strands over a special cap with holes worn on the head. For convenience, use the hook, experienced craftsmen make this tip of the comb.

The drawn strands are colored with a brightening compound. The thickness of the order, their placement and quantity depends only on the desire.
For a light effect, you can use every third hole., for the average, the locks are pulled out through one hole, intensive staining is obtained if all the holes are used.
It is easiest to use a cap on hair no longer than 15 cm. This is the most convenient and therefore the easiest way to highlight at home. Special hats with holes are used through which strands are drawn and painted in one color.
When using the package you need to cut it on one of the sides, and the resulting angle is worn on the head, tied at the back. Holes in the package can be made simultaneously with pulling the strand.
The procedure is carried out in the following sequence:
- Comb the hair in the direction of their growth and gently put on a perforated cap.
- Pull out the strands with the help of a hook: first at the temples, then at the crown and at the back of the head.
- The pulled out strands are well combed with a comb with frequent teeth, check with the help of the second mirror whether all the strands are pulled out at the temples and the back of the head, because it is easy to miss the necessary holes outside the line of sight.
- Put on gloves, prepare a brightening compound and apply it on the pulled out straps over the cap.
- Wait for the time specified in the annotation, controlling the clarification process visually. Perhaps the desired color will be achieved before the recommended time passes.
- Wash off the brightening composition without removing the cap.
- Comb the strands, head bent down, and gently pull the cap off, starting at the edges.
- Wash your hair with the agent recommended in the annotation to the brightening composition.
You will learn how to make hair highlighting independently through a cap at home in this video:
How to make highlight on foil? In this way, you can make both monophonic and multi-colored highlights. But this method is inconvenient in self-application.better ask someone to help.

For short hair, this method is not suitable. The sequence of the procedure is as follows:
- When using household foil, prepare strips about 10 cm wide and 2–3 cm long more than the strands.
There will be no such problems with specialized foil.because it is already cut into strips 30 cm long.
In the packaging of such strips is usually 50 or 100 pieces.
To learn how to make hair dyeing foil on your own at home, and what difficulties you may encounter, see this video:
Using a comb
The method of such highlighting without foil at home is convenient for self-staining without assistants.
The procedure is very simple and does not require special skills:

- Prepare a dyeing compound, a non-metallic comb or brush, wear gloves and cover the shoulders with a towel or a special cape.
- Sit down in front of the mirror, comb.
Brush the brightening compound onto the comb with a brush and comb it. in one movement on each selected area of the head, ranging from the hair roots to the tips.
No need to try to achieve uniformity, somewhere the composition will be more, somewhere less. This will create an interesting visual effect.
From this step-by-step video, you will learn how to make your own hands using a comb, and how difficult it will be to do at home:
With rubber bands
The method of highlighting the house on their own without foil and caps is convenient for medium-length hair. In addition to all you need to stock up on a few rubber bands.

The procedure is easy, assistants are not required for it:
- Prepare a lightening compound, cover the shoulders with a towel or a special cape.
- Divide the hair into strands, each secure with a rubber band to make a tail.
- Apply the composition to the tips of the tails, making feathers, and withstand the time required by the instructions.
- Remove the gum and wash off the composition.

Have you heard of the painting technique of shatush? On our site you will learn everything about this technology and the possibility of carrying out the procedure at home!
In our next review you will find some tips and advice on hair dyeing in the style of balayazh.
To find out how best to make coloring of light hair with dark strands, as well as a few photos with the results of dyeing, look here: https://beautyladi.ru/kolorirovanie-na-svetlye-volosy/.
Tips for self-coloring long, medium and short hair
The peculiarity of staining is that short hair often has to be cut.
Besides growing roots on them more visible, even if the hair grows at the same speed - a regrowth of 1 cm for long hair will be, for example, 2 percent of the length, and for a length of 10 cm, the regrown root will be 10 percent of the length and therefore will stand out more strongly.

Highlighting on short hair is better to do through the cap, because it will be inconvenient to separate short strands.
For long, only foil is suitable., because it will be impossible to remove the cap after dyeing and washing the strands.
Highlighting at home seems to be a very complicated procedure., but if you get acquainted with the techniques of performing dyeing using different tools, it turns out that there is nothing difficult, in fact, in this.
In addition, there are special kits for sale that facilitate the procedure at home. It remains to get acquainted with the sequence of operations and proceed to the case. Having learned, you can greatly facilitate your life by the fact that your hair will always be in order, and also save significant funds.
Shatush - a creative approach to lighting

This method is different in that the paint is applied to a pillow of combed hair. If desired, you can use foil. It is important to follow a few simple rules:
- Dirty hair.
- Bouffant.
- Do not drive the paint inside the pile, and put on top.
- When applying the coloring composition to retreat from the roots by 2 centimeters.
- Before washing the paint you need to foam, rinse your hair and only then apply shampoo. This will simplify the process of combing.
- Be sure to use hair care products after dyeing.
What is highlighting
Highlighting - a way to dye hair strands. At first, its meaning was to achieve the effect of sun-bleached hair, that is, partial lightening. Current trends denote with this term the obtaining of strands contrasting to the basic tone of almost any color — multicolored and dark.
The main advantages of technology:
- A gentle way to change the color of hair without the need for full dyeing,
- Effective masking of gray hair,
- Give the natural shade of depth and greater compliance with the ideal color type,
- Achieving the visual volume of hair,
- Not so noticeable growing roots.
Traditionally, ladies prefer to perform a similar procedure in a beauty salon. Highlighting there may be accompanied by other manipulations aimed at strengthening and healing the hair.
Highlighting on the cap
 In this case, a special cap with holes. Through them with the help of a hook for highlighting (sibel) strands are pulled out, to which the paint is then applied. Depending on the desired effect, the master determines the “step” of highlighting: it draws strands one from each hole or from every two or three. As a result, you can get a general light background or the effect of faded strands.
Foil weave
This method does not imply limitations on hair length. Before starting the wizard must determine the method of recruitment strands. There are four of them:

General rules
- Masters recommend do not wash your hair before coloring. The secret secreted by the sebaceous glands creates the natural protection of the hair against damage. Before the procedure, the hair is only slightly sprayed with water,
- In the conditions of a hairdressing salon, klimazon is applied to accelerate coloring (a flask with a fan on the rack). The master is obliged to ensure that the duration of the dye on the hair until it is removed does not exceed the required exposure time,
- Precompulsory test for an allergic reaction.
Highlight on dark and blond hair
 Delicate lightening of dark hair allows you to refresh your face, make it younger and more expressive. In this case, the brunette does not have to expose the chemical impact of the whole shock of hair. To lighten dark hair not very large width of the strand is enough - up to 6 mm. Variants of shades: caramel, golden, light brown, cocoa, beige and others.
Highlighting on blond hair is very refreshing to their hostess, allows you to get the effect of volume and thickness of hair. The latter is especially true for those who have thin.
To create a spectacular image when highlighting on blond hair The following methods are used: veil, shatush, californian and reverse highlighting.
How to make highlighting independently at home
Despite assurances from representatives of the beauty industry that you can become beautiful only in beauty salons, highlighting at home is quite possible. You get a lot of money savings and confidence that you can always change your image for the better. The main thing is to have the necessary materials on hand and become familiar with the simple algorithm of actions.
Tools:
- Gloves
- Cloth cape so as not to stain clothes
- Flat brush for coloring
- Cap, hook for pulling hair or comb (for highlighting with a cap)
- Foil strips (special or food), the size of which must be twice the length of the colored strands with a minimum width of 10 cm
- Capacity for paint dilution (glass or plastic)
Did you know that with crayons for hair you can easily dye your hair even purple? How to do this, read here.
Dye selection
You should not use the same composition for different types of hair. With weakened, thin and damaged hair, 3% oxidizer is sufficient. With sufficient density of dark hair, you can use 12%. Ladies with blond hair will go 6-8%. Highlighting at home can be done with a lighter (a few tones different from the natural color) hair dye.
Use the cap
 Highlighting at home with a silicone cap is best done on hair with a length no more than 15 cm. The main accessory with crochet (set for highlighting) is purchased in a specialized store for hairdressers. You can use the available tools: cellophane, plastic bag, swimming cap with holes, done in a checkerboard pattern. Instead of the hook - the tip of the comb with a long narrow handle.
Application technique:
- Through the holes in the cap pulling strands. To create a common light background - in each hole. If you pull through one hole, the intensity of staining will be average. Light glare can be obtained with step two or three,
- Diluted paint is applied using a standard flat brush. Exposure for a light effect should not exceed 15-20 minutes. A more tangible effect is achieved after 30-45 minutes.
- Washing the hair after dyeing produce without removing the cap,
- We apply a therapeutic balm with massaging movements,
- We wash off.
We use foil
This method is suitable for hair medium and long length.

Highlighting in a circle
Spectacular and very easy way. Cut a hole in the center of the circle through which we pull out part of the hair. The greater the intensity of staining required, the thicker the strand is drawn. Evenly distributing it in diameter, paint, close with foil. Further steps are similar to the previous methods.